Work From Home

Prior to being deployed to work from home, users should complete this speed test and submit the results to their supervisor.

Speed Test Instructions

Prior to being deployed to work from home, users should complete this speed test and submit the results to their supervisor. 


Step one: Go to https://getvoip.com/speed-test-tool/ and click “Start”.


image.png


Step 2: After the test completes, click the Copy button and send the URL to your supervisor


image.png


Manually configuring OpenVPN

Step 1: Add Foxpass to Microsoft Authenticator

  1. Visit console.foxpass.com
  2. Enter callinsite.onmicrosoft.com in the domain name, click continue
  3. Click the green Sign in with Microsoft button. Using your CallInsite credentials, sign in.


image.png


image.png

  1. Click the link that says “Set a Password"

image.png


Step 2: Install/Configure OpenVPN Connect

  1. Launch Open VPN Connect.

OpenVPN Connect should already be installed on your computer. Look for this icon on your desktop: 

If you do not have it, click here to download the latest version. 


image.png


  1. Scroll down to Launch Options and select Restore connection

image.png

  1. Scroll down to Launch Options and select Restore connection.

    Press the Left Arrow when finished.

image.png


Step 3: Download the VPN Profiles:
  1. Download both VPN profiles:


All Agents: Indy Primary

Fort Myers Backup


  1. When prompted to Import the .ovpn profile, click OK.


image.png

  1. Type your complete CallInsite Email in the Username field, the password you created in step 1, and click CONNECT.


image.png

  1. To connect to a network, toggle the switch.

image.png

  1. To disconnect, click the green toggle

image.png

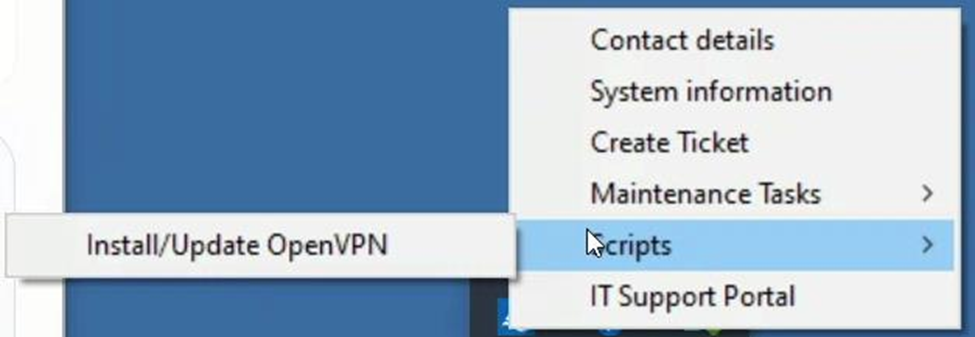
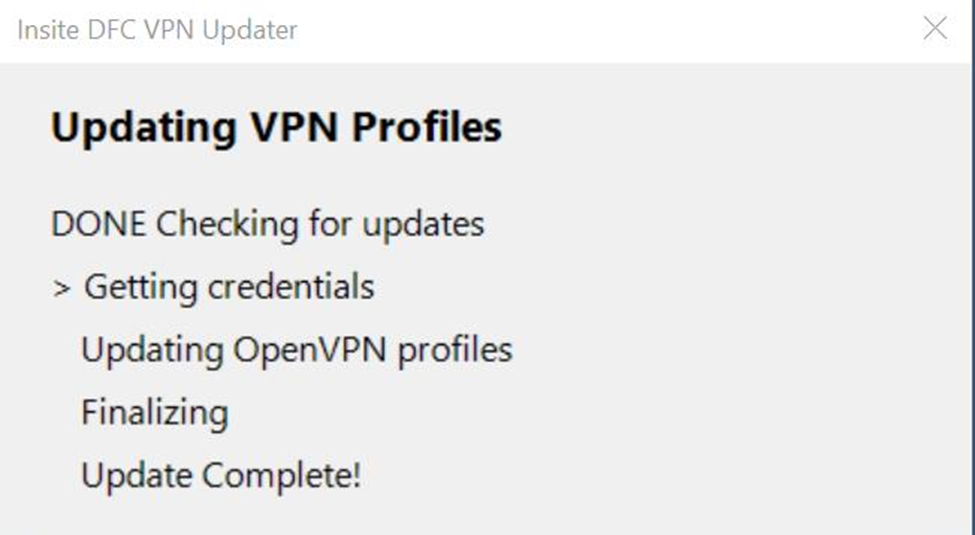
Install / Update OpenVPN

Step 1: Begin Update Script


The update script has been designed to reduce user input. It will: 

  1. Check that OpenVPN is installed and up to date. If not, it will install/update the program (Windows 11 only)
  2. Generate a new VPN password
  3. Download the latest VPN profiles from Insite's servers and insert your credentials (no remembering another password!)
  4. Restarts OpenVPN. 

The process takes around 3 minutes start to finish. 


  1. Open the system tray and find the Insite Engagement Centers icon, right click it.


image.png

  1. Click Scripts then Install/Update OpenVPN

image.png


After a few seconds, you will see this box letting you know the process has started. 

image.png

It may take up to 2 minutes for the system to process your request. Once started, you will see this screen

image.png


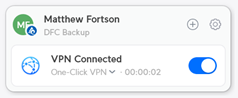
Install and configure UniFi Identity VPN


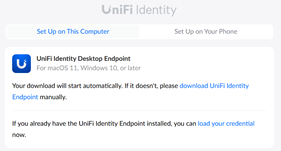
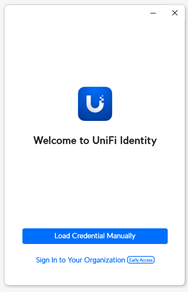
1.       Open the email from identity@ui.com.


Click the Get Started option.


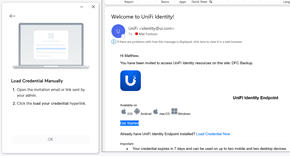
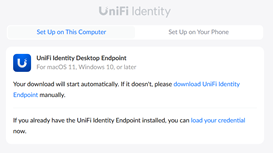
2.       The download should automatically start for UniFi Identity Desktop Endpoint.

If it does not, select the “download UniFi Identity Endpoint” option.


A screenshot of a computer error

AI-generated content may be incorrect.


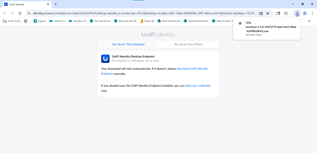
3.       Once the file has downloaded, select it when it shows in the top right corner.


A screenshot of a computer

AI-generated content may be incorrect.


4.       The application will load as shown.

Select the checkbox to agree to the User License Agreement, and then select Install.


A screenshot of a phone

AI-generated content may be incorrect.


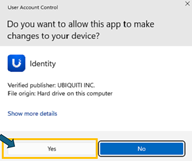
5.       If you see a User Access Control box, click Yes if available. Otherwise, select the “Request ThreatLocker Elevation” bubble and submit the request. Someone from the IT Support team will be in touch within 5 minutes (within normal business hours) with further instructions.

A screenshot of a computer error

AI-generated content may be incorrect.

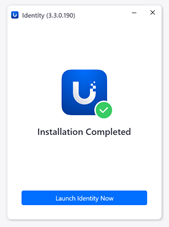
6.       The application will start to finalize its installation.

Once it has completed, select the Launch Identity Now option.


A screenshot of a phone

AI-generated content may be incorrect.


7.       Select the Load Credential Manually option.


A screenshot of a phone

AI-generated content may be incorrect.


8.       Reopen your email from UniFi and select the Load Credential Now option.

After clicking this option, you will be directed back to the identity.ui.com website.


A screenshot of a computer

AI-generated content may be incorrect.


9.       Select the Load Your Credential option to start the process.


A screenshot of a computer error

AI-generated content may be incorrect.


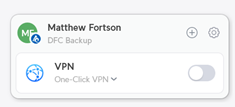
10.   The VPN will now open in the bottom right corner of your screen.

To turn the VPN on, simply click the switch.

You are now connected to the VPN!


A screenshot of a computer

AI-generated content may be incorrect.


A screenshot of a computer

AI-generated content may be incorrect.


11.   Repeat steps 8-10 with the second Welcome email to add the alternative VPN site.