Agent How to Guides
How to guide for agents troubleshooting general PC issues, headsets, Genesys, etc.
- Accessing Insite Email
- Add Egnyte as "A Place" in Office
- Beeping Headset
- Connect Bluetooth Headset
- Headset muting/unmuting by itself
- Install Grammarly
- Reporting PCI Policy Violiatons
- How to Install Visio
- Introducing Flash's new IT Support Portal
Accessing Insite Email
With the implementation of SSO for Salesforce within the DFC program, you may encounter the following when logging into your email:

To log in, follow these steps:
- Go to office365.com in Chrome and sign in
- Click your initials or your photo in bottom-left corner of the screen, make sure you see your Callinsite email first.
- If you're signed in with your Delta/MASCO account, you should see your Insite account in the list at the bottom of that window. Click that. If not, click "Sign in with another account" and sign in with your Insite account.
- Click Apps on the left pane, then Outlook at the top of the screen.
Add Egnyte as "A Place" in Office
To enable Co-Editing with the new Egnyte updates, follow these steps:
|
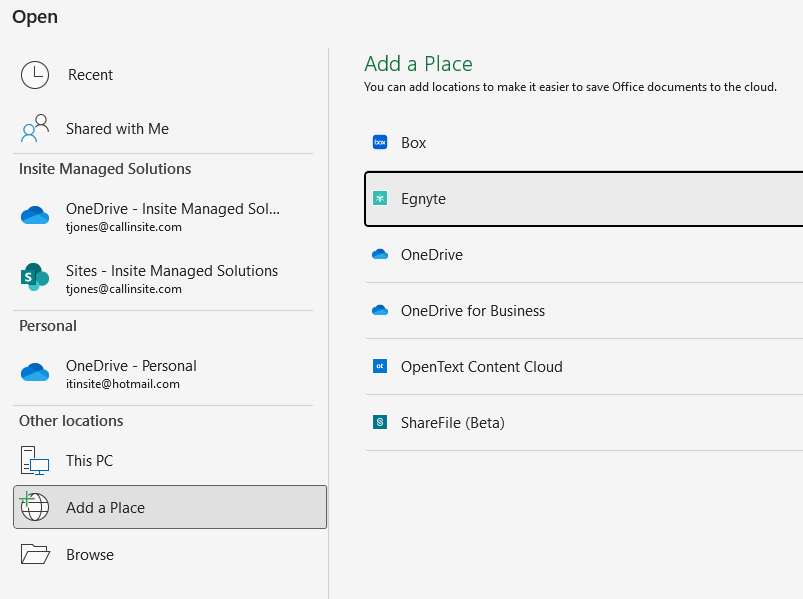
Step 1: Open any Office program (Word, Excel, PowerPoint) and click File > Open.
Select “Add a Place”, then chose Egnyte |
|
|
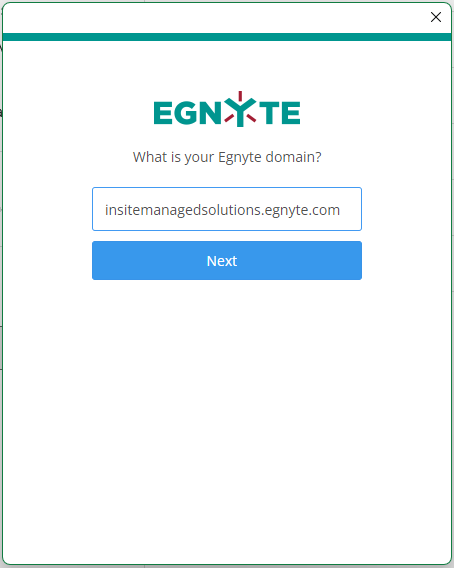
Step 2: Enter “insitemanagedsolutions.egnyte.com” (without the quotes) in the domain space and sign in.
|
|
|
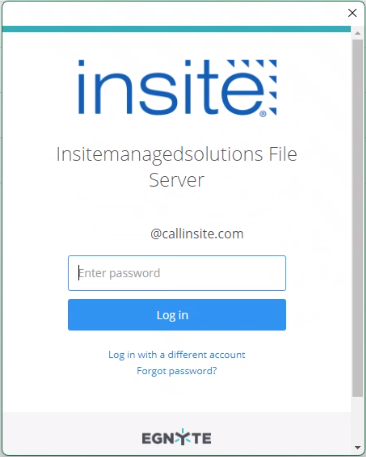
Step 3: Enter your CallInsite email address and password on the following screens |
|
|
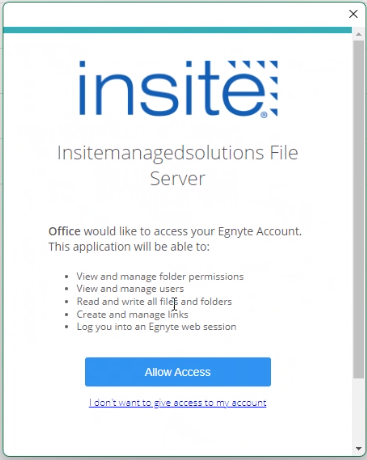
Step 4: Click “Allow Access” on the confirmation page |
|
Beeping Headset
OVERVIEW
This article will describe how to solve for your headset beeping consistently. Some reports have indicated that the microphone will also be muted during this period.
PROCEDURE
The issue stems from an issue with Teams setting the headset to "hold" and not releasing it. To resolve, simply quit and re-open teams. To quit teams, find the icon in the lower-right corner of the screen. Right click it, and chose quit.

Once closed, you should notice the beeping has stopped. You may now re-open teams.
Connect Bluetooth Headset
|
Step |
Description |
Screen Shot |
|
|
|
|
|
|
|
Put your headset in pair mode, slide and hold the Power switch away from the off position until you hear "pairing" and the headset LEDs flash red and blue. |
|
|
4. Search for Bluetooth devices |
1. On the screen that comes up, click “Bluetooth” 2. When you see your headset in the list, click it to pair. |
|
|
Wait until the connection completes. Note: If prompted to use Swift Pair, click No Thanks. |
|
| 6. Set up Genesys | Open the Genesys Application on the bottom of your screen. Once your signed in click on the voice button on the side pane and then click settings gear icon |
|
| Click Performance, then under Media Controls click the arrow next to "Use Computer Settings" |
|
|
| Select new profile |
|
|
| Select the Poly headset for all three input/output options |
|


Headset muting/unmuting by itself
If your headset continuously says "muted, un-muted" repeatedly, you'll need to reset the proximity sensors in the headset. Follow these steps:
There are two ways to reset the headset sensors.
- With your headset powered on, charge your headset on the charge stand for 10 seconds
- Press and hold both the Mute and Play/pause buttons for more than 4 seconds until the LEDs flash purple twice, being careful to not touch the earcup padding or allow it to come in contact with surfaces
Alternatively, you may opt to disable the sensors. You can disable these by holding both the Mute and Call buttons for more than 4 seconds until the LED flashes purple then red. Repeat to reactivate; the LED flashes purple then blue.

Install Grammarly
Once set up, you will receive an email from Grammarly to set up your account with them. Please follow those instructions. If you do not have an email, please submit a request for a license to IT Admin.
You will need to install 3 plugins in total:
Windows App: https://download-windows.grammarly.com/GrammarlyInstaller.exe
Chrome Plugin: https://chrome.google.com/webstore/detail/kbfnbcaeplbcioakkpcpgfkobkghlhen
Office Plugin: https://download-office.grammarly.com/latest/GrammarlyAddInSetup.exe
Please download and install these plugins to complete your setup.
Reporting PCI Policy Violiatons
If you believe you have observed a PCI Policy violation, it is important that you report it immediately for further investigation and remediation. You may report a violation by filling out the following form. Note, you must be logged into your Insite email account to access this form.
https://forms.office.com/r/GEgKXw4Asn

How to Install Visio
After you have had a Visio license assigned, you must download and install the software onto your computer. To do so, follow these steps:
- Go to www.office.com and if you're not already signed in, select Sign in.
- Sign in with your CallInsite.com login.
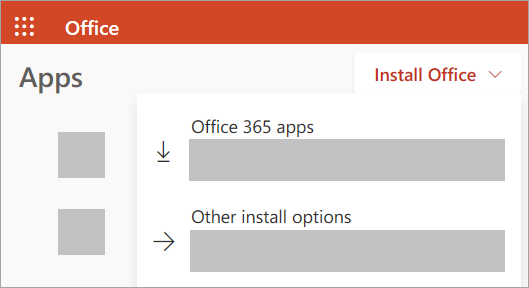
- From the Office home page select Install Office > Other install options. (If you set a different start page, go to admin.microsoft.com/account#installs.)
- From My Account, select Apps & devices.
- Find Visio from the list and choose your language and the 64-bit or 32-bit version, then select Install Visio. (If you have any other Office apps installed, make sure to select the same bit version for your Visio installation. What version of Office am I using?)
Install Visio
- Depending on your browser, select Run (in Edge or Internet Explorer), Setup (in Chrome), or Save File (in Firefox).
If you see the User Account Control prompt that says, Do you want to allow this app to make changes to your device? select Yes.
The install begins.

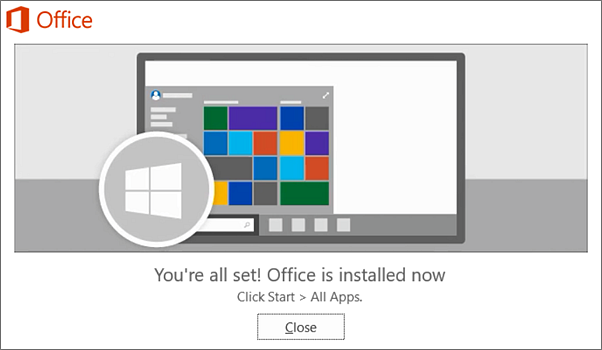
- Your install is finished when you see the phrase, "You're all set! Visio is installed now" and an animation plays to show you where to find the Visio app on your computer.
Follow the instructions in the window to find Visio. For example, depending on your version of Windows, select Start and then scroll to find Visio from your list of apps.
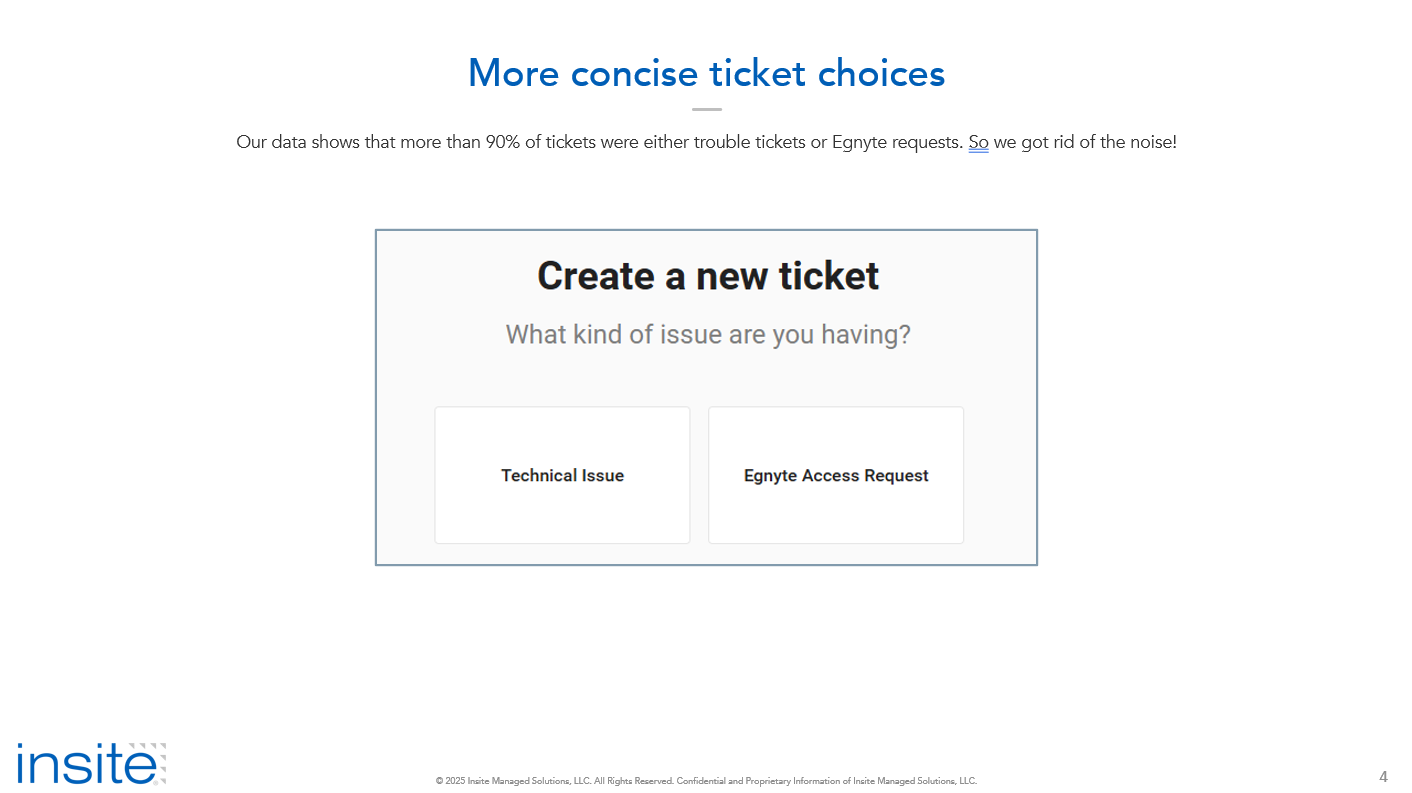
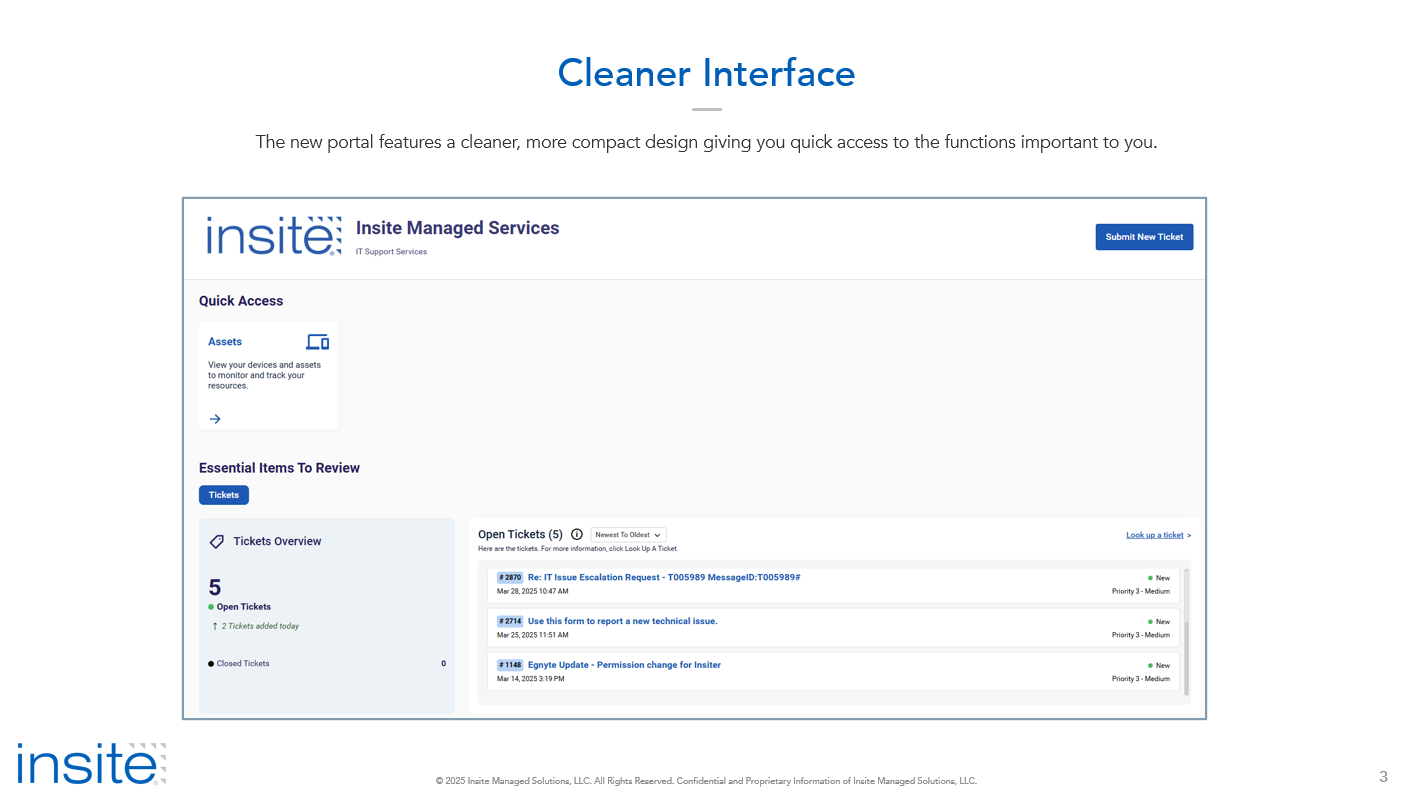
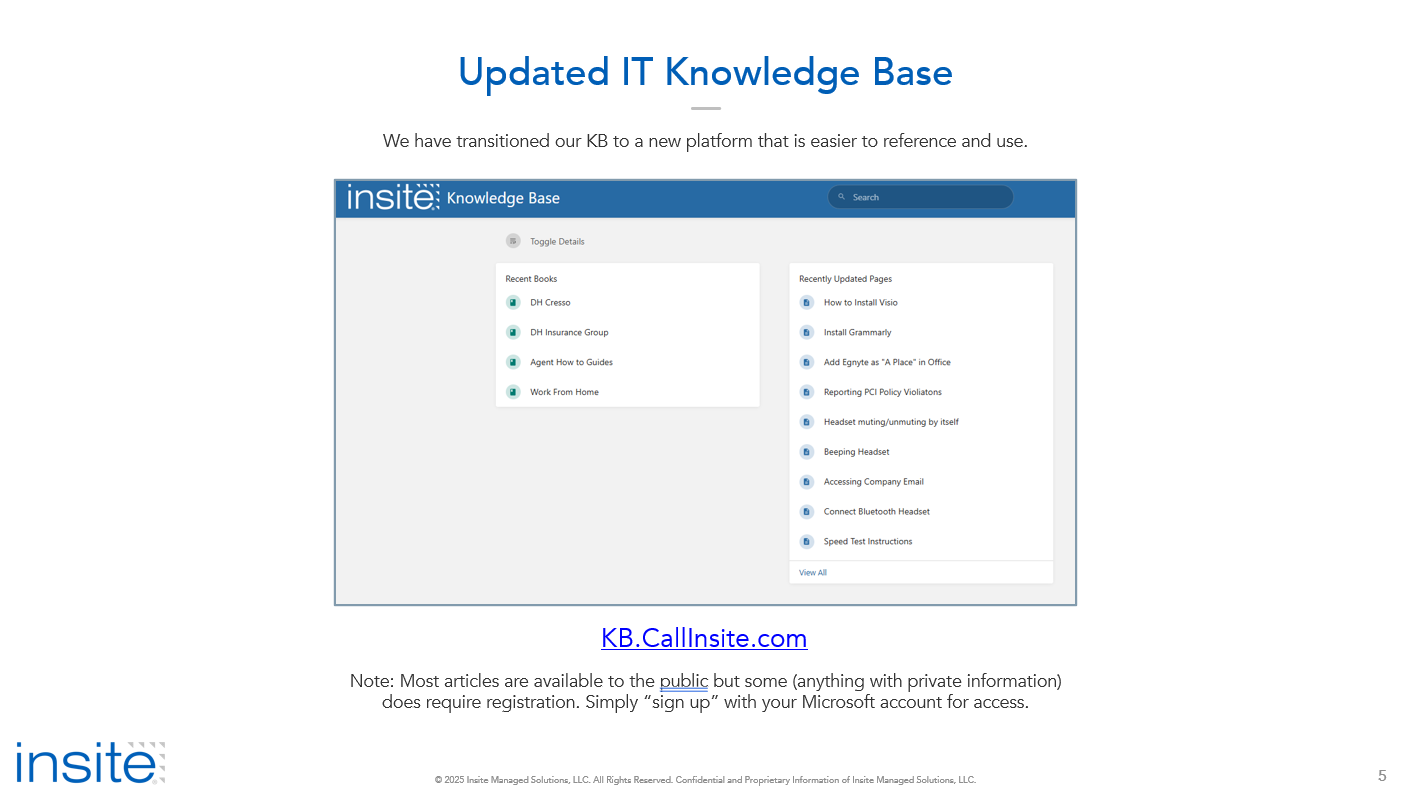
Introducing Flash's new IT Support Portal